Technique to build legs from house copper wire and pewter feet
Here is a tip to making great legs!
No! Not that kind. Bird legs.
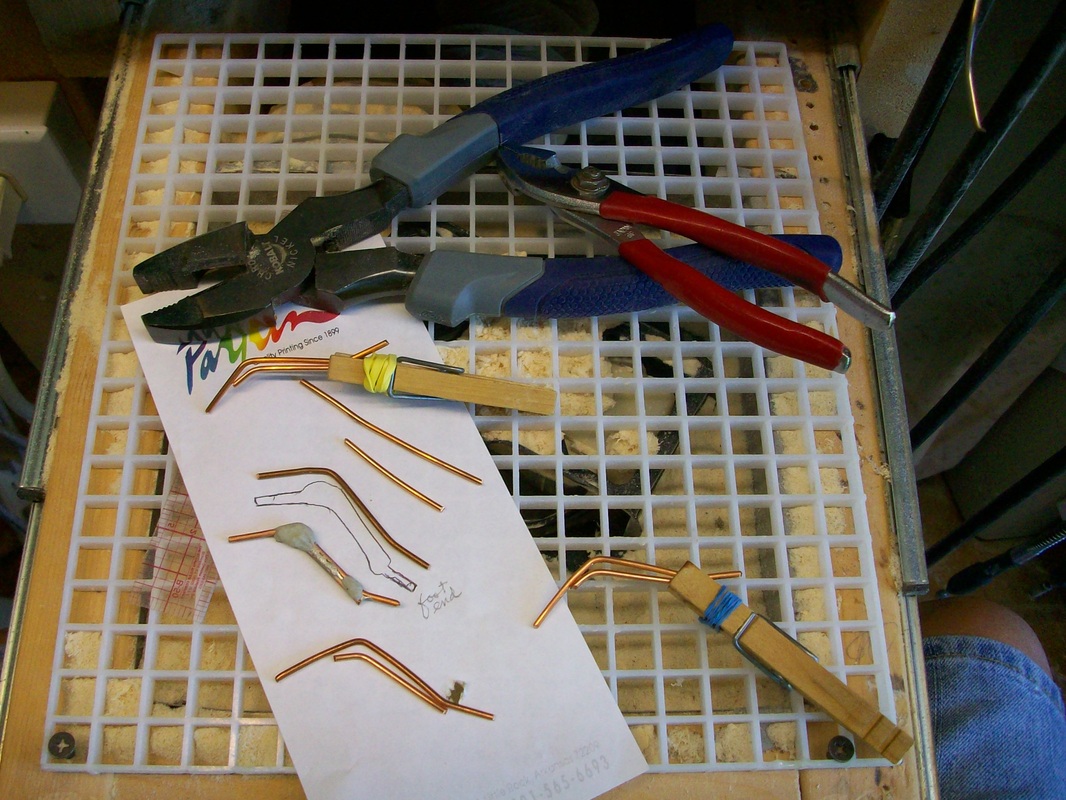
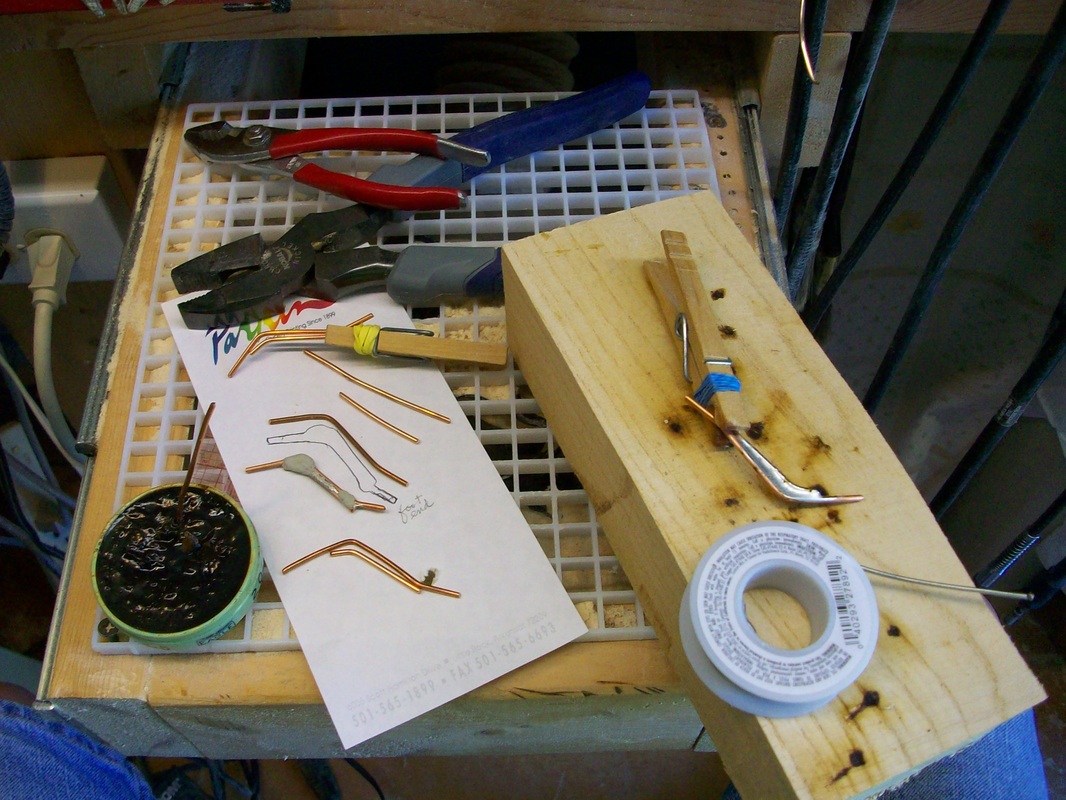
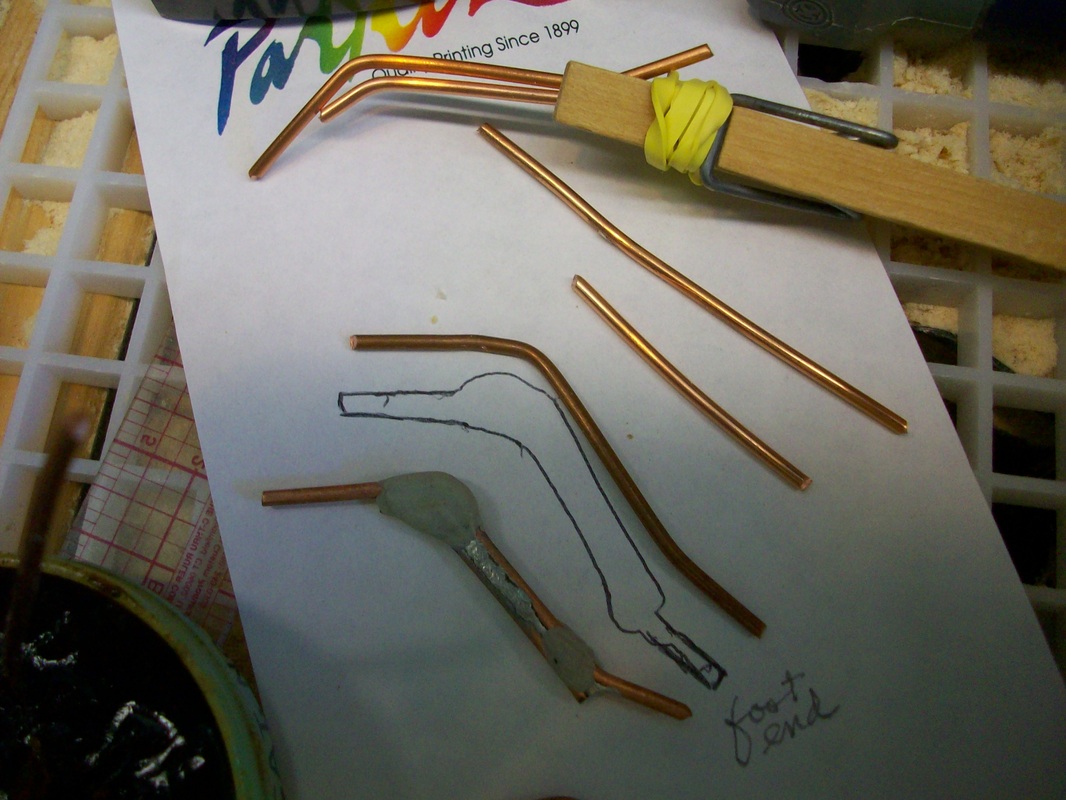
For my bee eaters I used the toes only feet from Woodcraft Shop (see Links for web) #51406. Strip the insulation and pull the copper wire through some sand paper to rough the surface up some. Now depending if you want a straight leg or a bent one, you cut your piece to size, bend it and cut the second piece and bend it. I use wooden close pins for clamps with a rubber band to gain some more strength. Solder will not stick to the wooden pins. Add flux to the copper and I use my electric solder iron that I have had for 40 years to solder the two together (see pictures). Just flow enough to fill the crack. You may have to lay flat, fill with solder and then angle a little to get the solder to flow to some of the open area. If you get too much solder, do not worry you can sand the excess off. Best look is one with a slight depression between the wires to look like the bones of the leg. (see photos) The copper needs to get real hot to get a good job. After it is cooled, you still can bend it some. This is a good strong leg. If you use only one piece of wire it may sag in time with the weight of the bird or get bent, the 2 strands make a reinforced leg and they also look real.
Next use a good detergent like Orange Blast to clean the flux off. I soak it for several ours and use a tooth brush to finely clean it. You should get a real clean copper look. Open the hole in the foot with a drill so the copper just fits it. Epoxy the foot on only after you have made a fit to branch or base and body of the bird. Next is the real simple part. Roll a piece of Kullis Karvet in a ball about the size of a pea. Use this to make the upper joint and if necessary fill in some of the leg. Now roll from of the Kullis to a string, wrap around the top of the foot and detain to make a smooth connection to the leg and foot. Texture for full effect.
You are now done.
If you are doing a small bird like a chickadee, use the proper foot size and get some smaller brass rod the size to match the bird leg at Hobby Lobby or Micro Mart.
No! Not that kind. Bird legs.
For my bee eaters I used the toes only feet from Woodcraft Shop (see Links for web) #51406. Strip the insulation and pull the copper wire through some sand paper to rough the surface up some. Now depending if you want a straight leg or a bent one, you cut your piece to size, bend it and cut the second piece and bend it. I use wooden close pins for clamps with a rubber band to gain some more strength. Solder will not stick to the wooden pins. Add flux to the copper and I use my electric solder iron that I have had for 40 years to solder the two together (see pictures). Just flow enough to fill the crack. You may have to lay flat, fill with solder and then angle a little to get the solder to flow to some of the open area. If you get too much solder, do not worry you can sand the excess off. Best look is one with a slight depression between the wires to look like the bones of the leg. (see photos) The copper needs to get real hot to get a good job. After it is cooled, you still can bend it some. This is a good strong leg. If you use only one piece of wire it may sag in time with the weight of the bird or get bent, the 2 strands make a reinforced leg and they also look real.
Next use a good detergent like Orange Blast to clean the flux off. I soak it for several ours and use a tooth brush to finely clean it. You should get a real clean copper look. Open the hole in the foot with a drill so the copper just fits it. Epoxy the foot on only after you have made a fit to branch or base and body of the bird. Next is the real simple part. Roll a piece of Kullis Karvet in a ball about the size of a pea. Use this to make the upper joint and if necessary fill in some of the leg. Now roll from of the Kullis to a string, wrap around the top of the foot and detain to make a smooth connection to the leg and foot. Texture for full effect.
You are now done.
If you are doing a small bird like a chickadee, use the proper foot size and get some smaller brass rod the size to match the bird leg at Hobby Lobby or Micro Mart.

Video on brass bird feet construction
Here is a great how to make bird legs and feet. Watch Jerry Simchuk demonstrate how to make your own bird feet using brass wire
and epoxy. You'll also learn how to texture the epoxy with power carving tools. An 11 min. excerpt of a 90 min. video. Sponsored by Sugar Pine Carving Supply.
http://www.youtube.com/watch?v=am---iJuWw0&feature=youtu.be
on line catalog
http://www.sugarpinewoodcarving.com/index.html
and epoxy. You'll also learn how to texture the epoxy with power carving tools. An 11 min. excerpt of a 90 min. video. Sponsored by Sugar Pine Carving Supply.
http://www.youtube.com/watch?v=am---iJuWw0&feature=youtu.be
on line catalog
http://www.sugarpinewoodcarving.com/index.html
