Insect Wings for Habitat & carving. Newest post on this page are at the bottom.
Check the BLOG for more info.
Pattern making insect wings
This tip is to show you how you can make wings for your carved BUGS! Exciting isn't it.
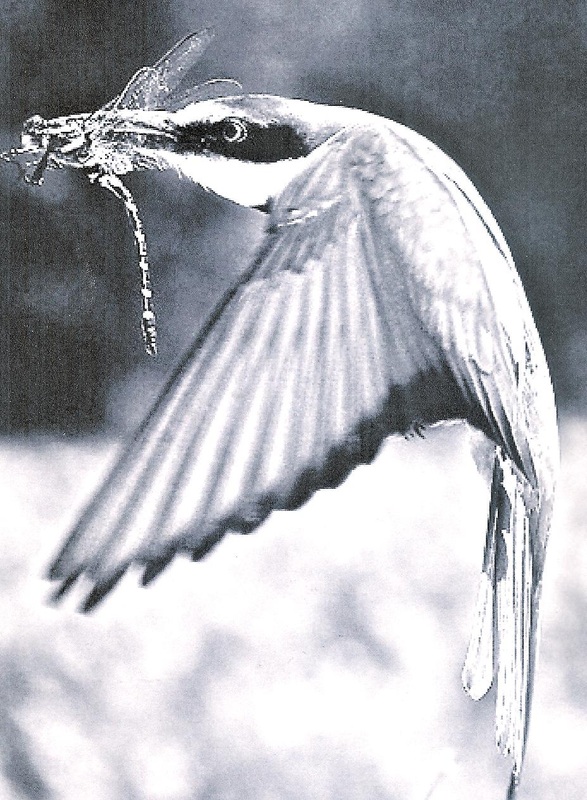
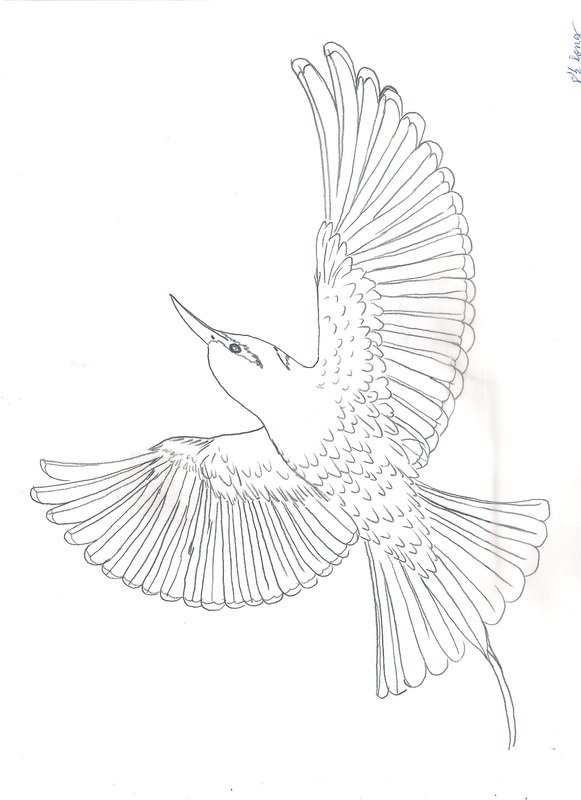
This is the accumulation of some ideas I have had and some I have picked up from many sites on the internet as well as some books.So here is my suggestions of the best of the best, In my humble opinion. I have a class at War Eagle Seminars this September here in NW Arkansas of a European Bee Eater and I want to offer a bumble bee to add to the habitat. First I found a colored picture of the specimen. Using a light box from Hobby Lobby, I started a test tracing using 3 pens, a 7mm pencil with HB medium lead, the second one is a Sharpie extra fine pen, last is just a fine point ball point pen with black ink. What seemed to work best is the lead pencil using it on Pyrography Paper from PyroPaper (Woodcraft Shop) Translucent. This has a very smooth finish but has some tooth to it. I have also used drafting Vellum from a drafting supply, that worked well too, but I like the pyro best. I traced or drew the image at 2X size, if I am satisfied with the results, I then take it to my copier and reduce to life size for final copying on Kodak satin paper, then take this to an overhead transparency at a copy shop. To take it to one step further I have made a sheet of bug wings, harvested from the front of the car. Attached each wing plus the drawn ones to 65# bright white cover stock. Taking this to the local copy house and get a black overhead transparency made. I am going to try out the color one this next time and will add pictures of that when I get them done. Trim out the wings and attach them to your carved bumble bee, dragon fly, or locust and they are impressive when finished. 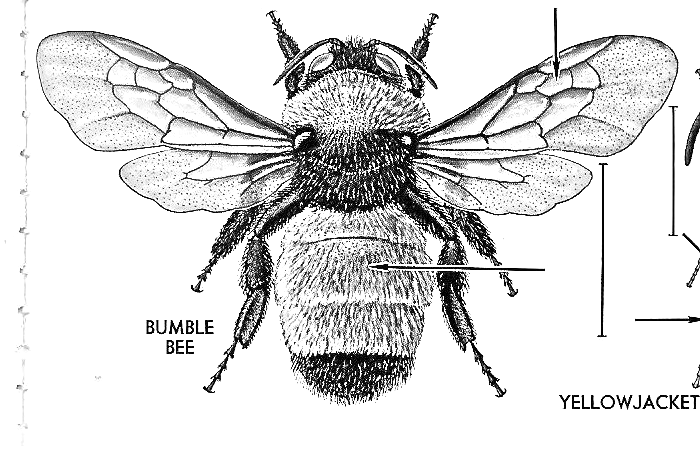 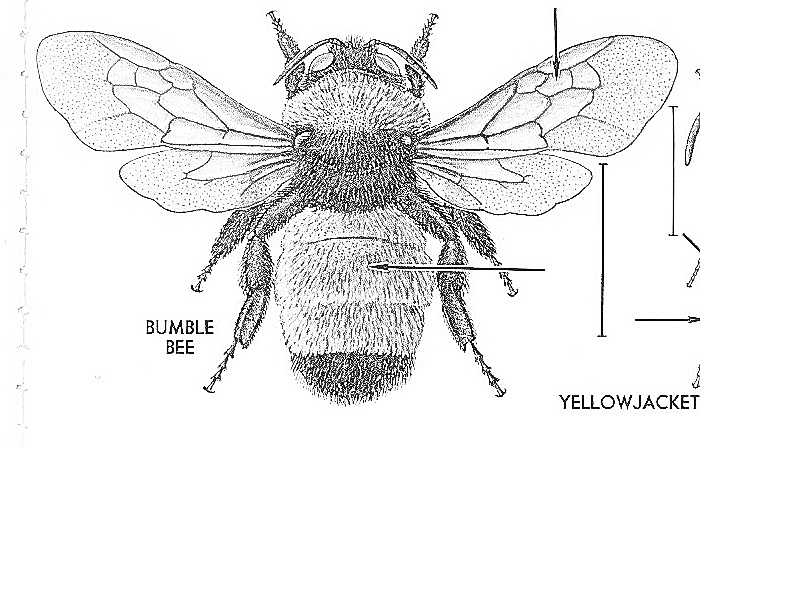 The above two pictures are pencil conversions from a color picture using PINTA, a free software. This gives an uncluttered black and white drawing that you can do the overlay traceing.
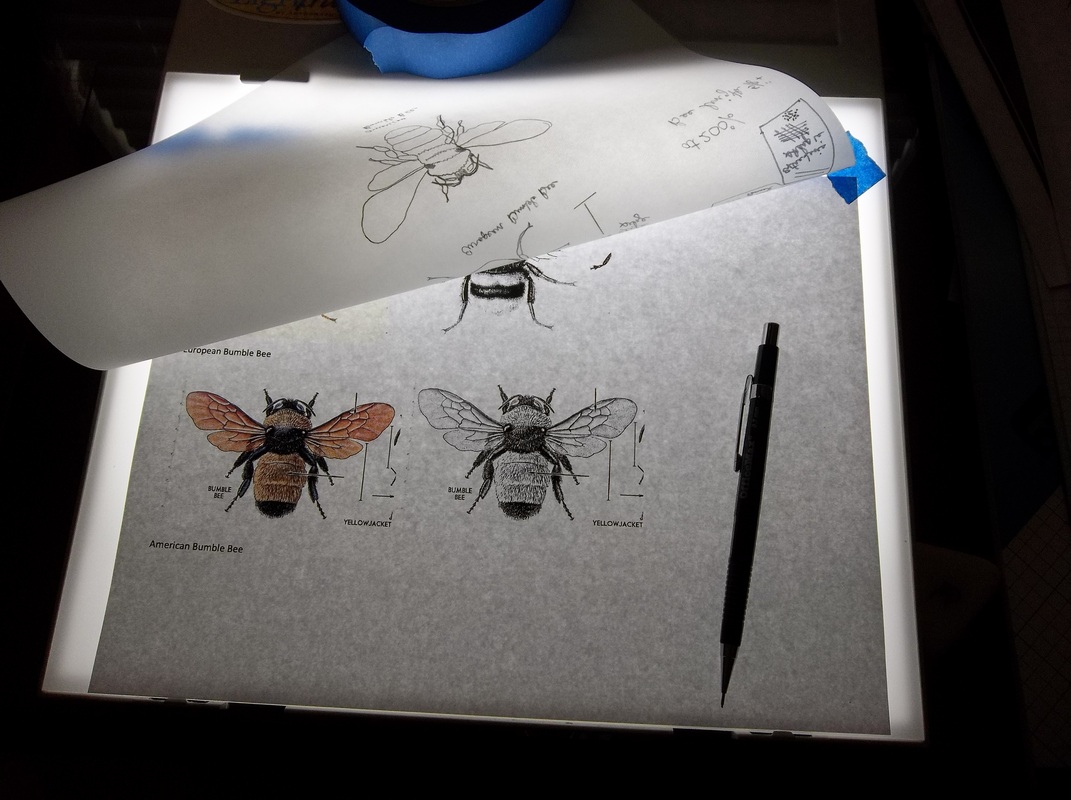 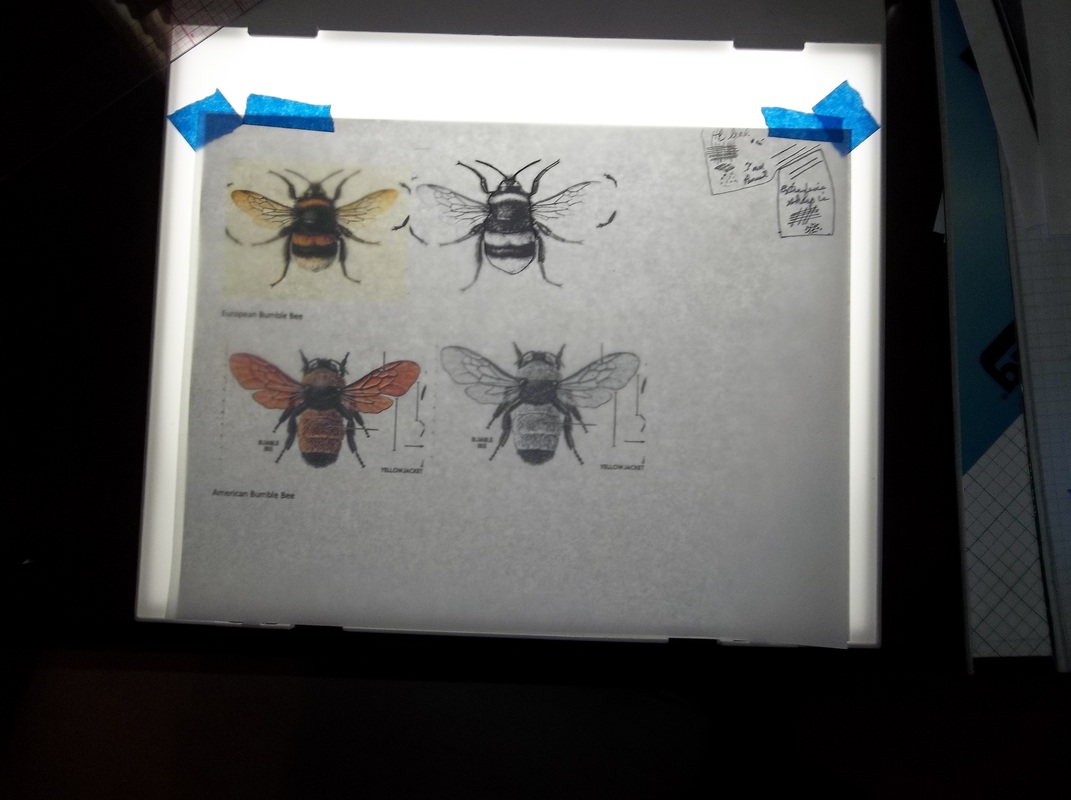  Here you can see the layout for the tracings and the basic things you need. The one on the right has several real wings from the bug box.. Remember when you take the wings to the copy shop they most likely will destroy them when they put the platum down on them so be prepared. I have them make several , without removing them from the glass. Best insurance. Expect some shadowing around the wings, but this just adds detail to them.
The one on the right has some real wings plus a dragon fly (thanks to someone on WCI Forum who offered the drawing) I previously had copied onto transparency and added it here to see what it looks like in color. The right side, second & third one up is the traced bumble bee pattern. The center picture shows the tracing. The left one shows the color copies and next to them the pencil conversion that I work from. We will carve and detail the bees and dragonflys later. Bee Eater PatternsHere are the Bee Eater line drawings and final patterns.
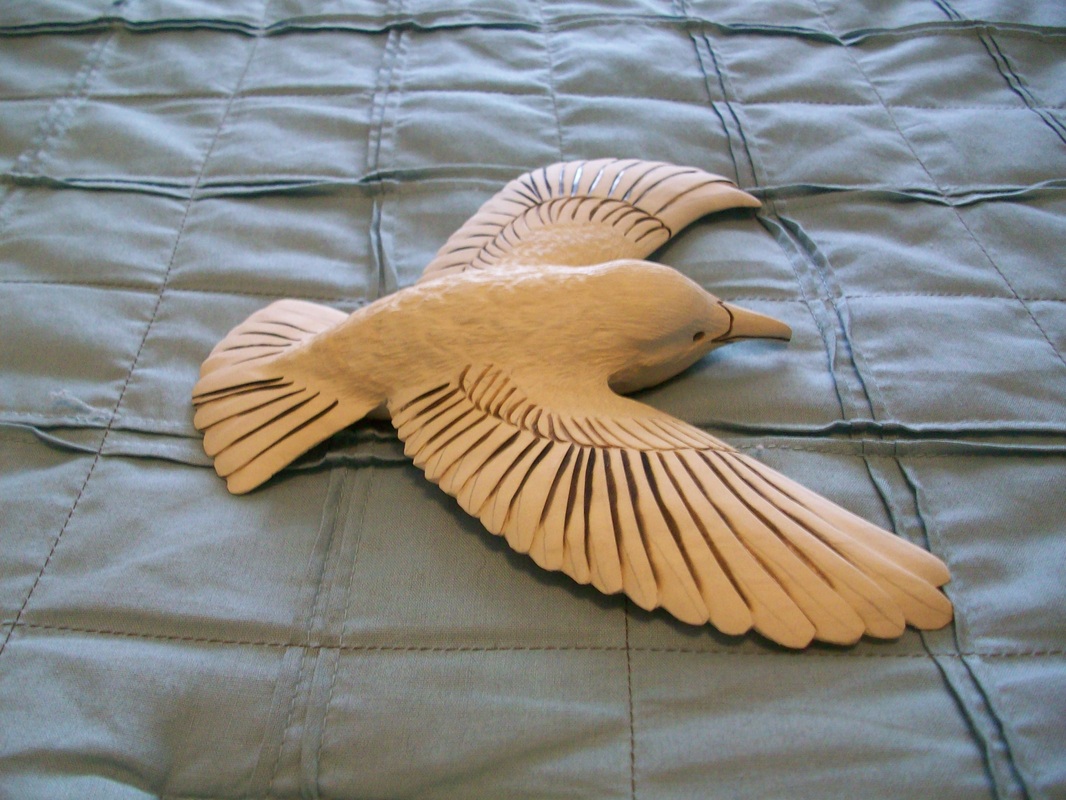
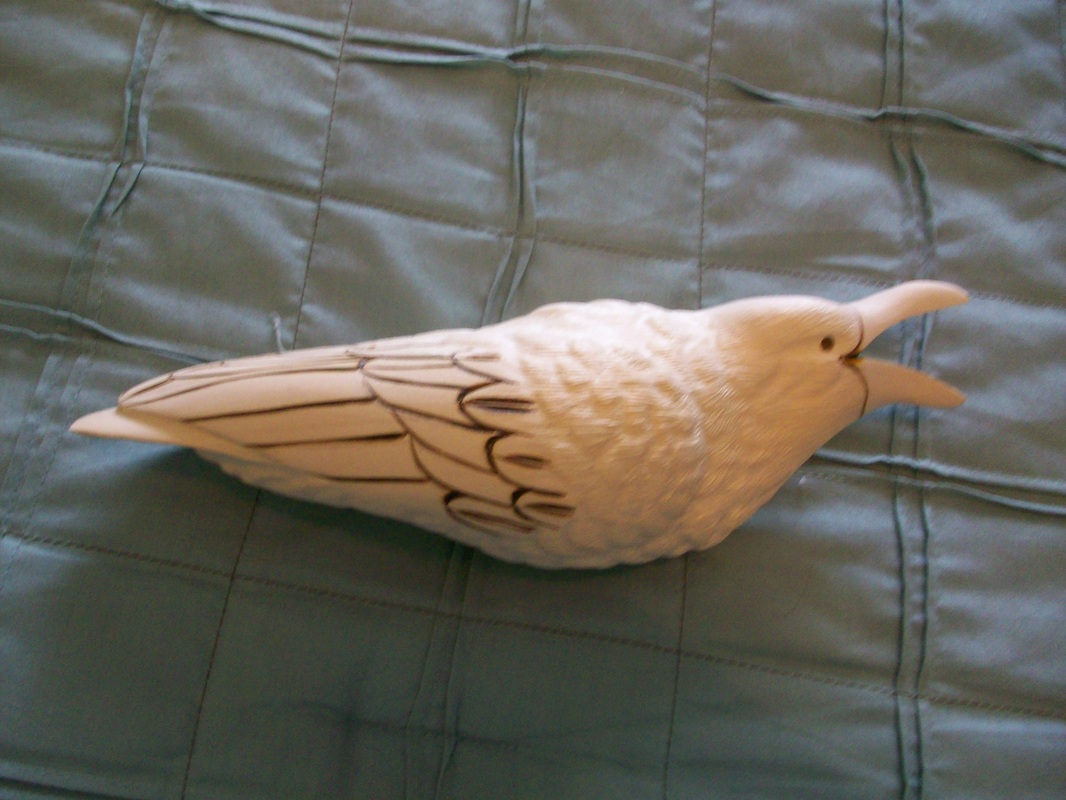
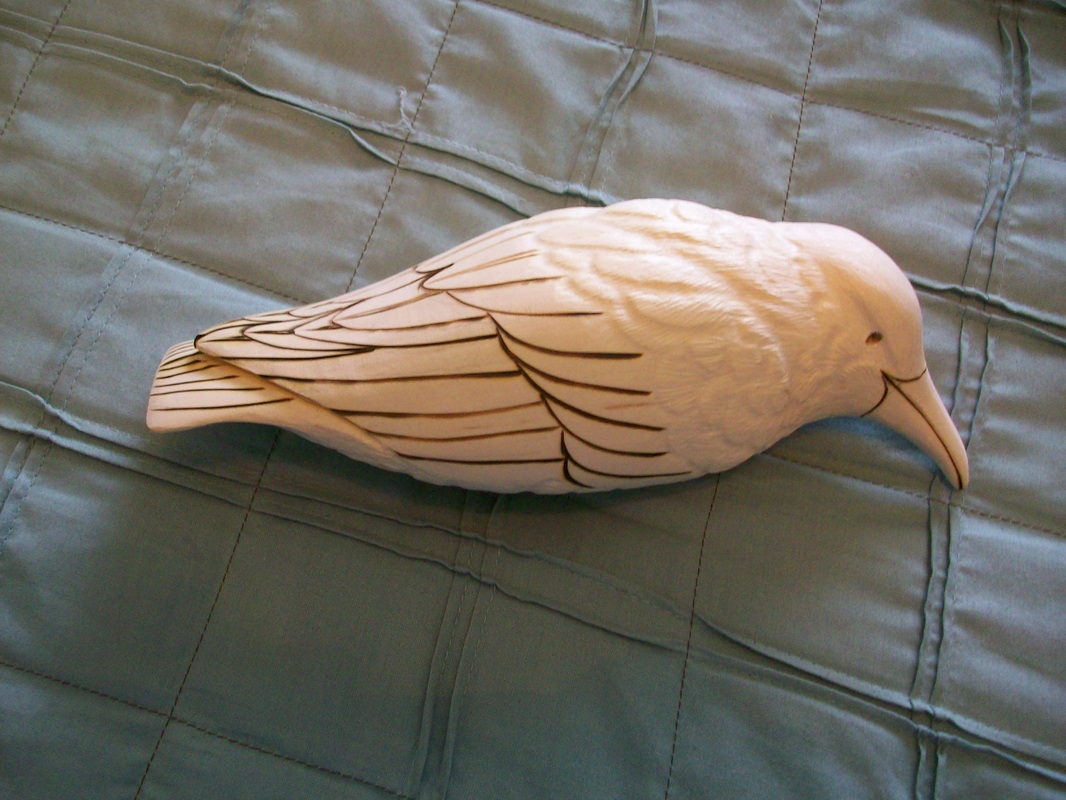
      Rough outs from Tupelo.
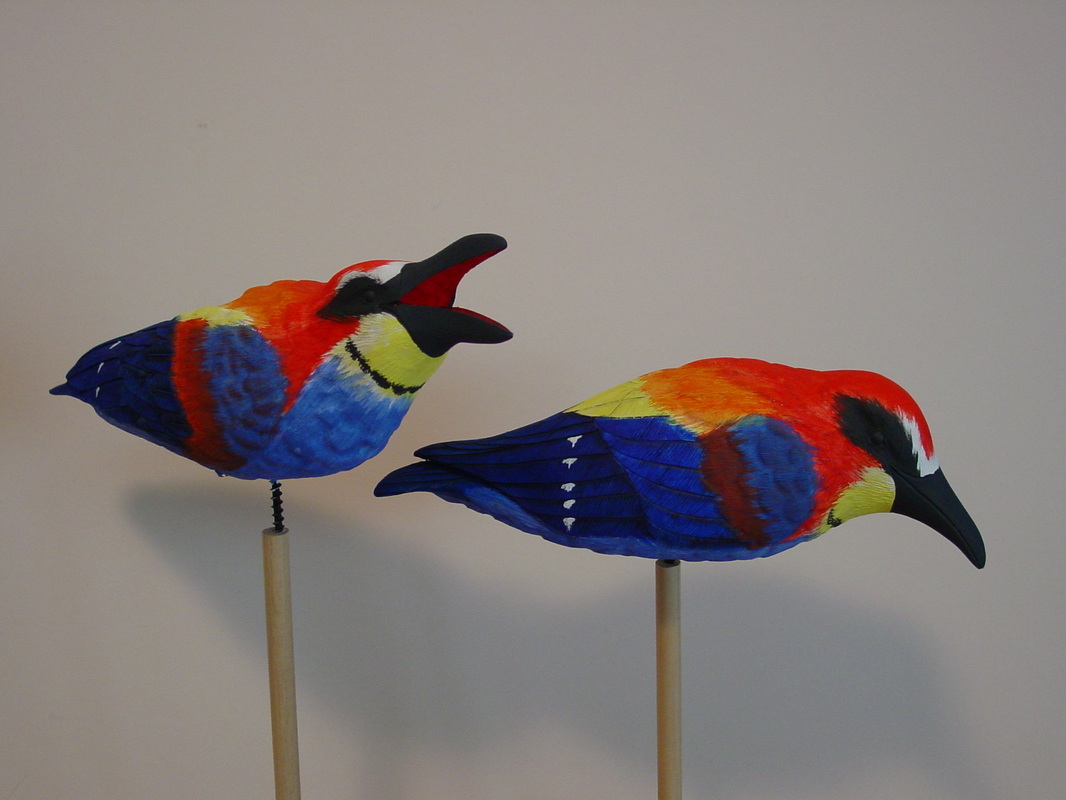
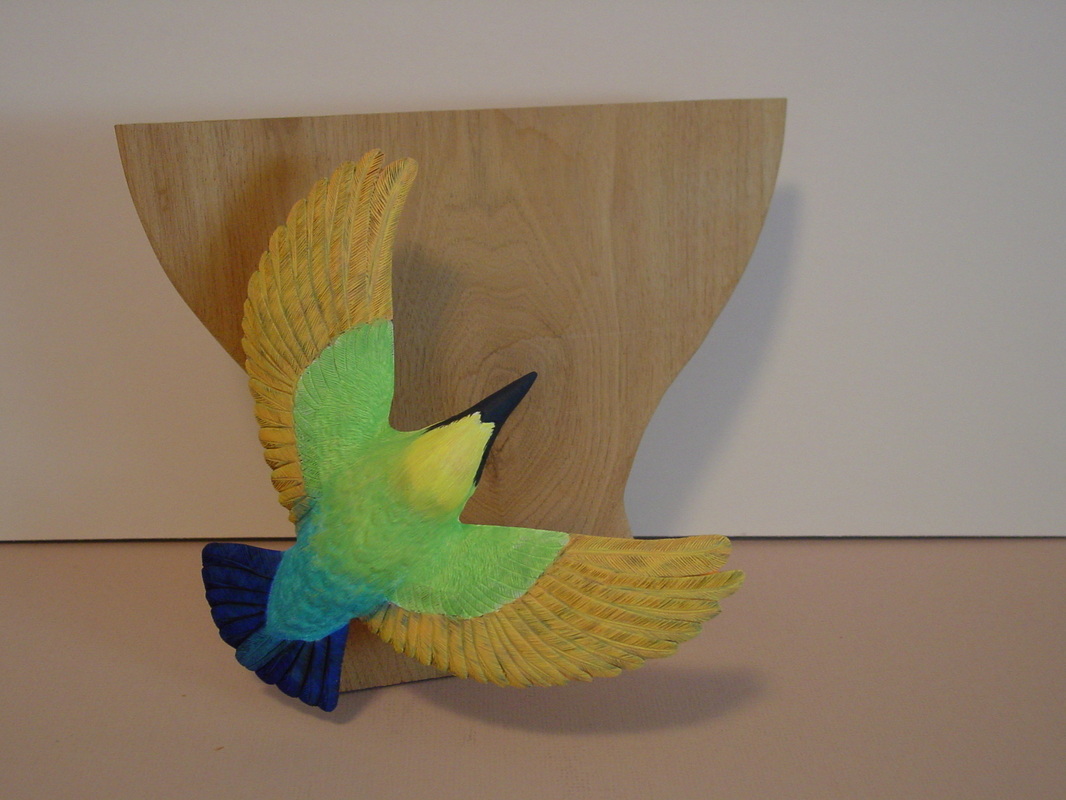
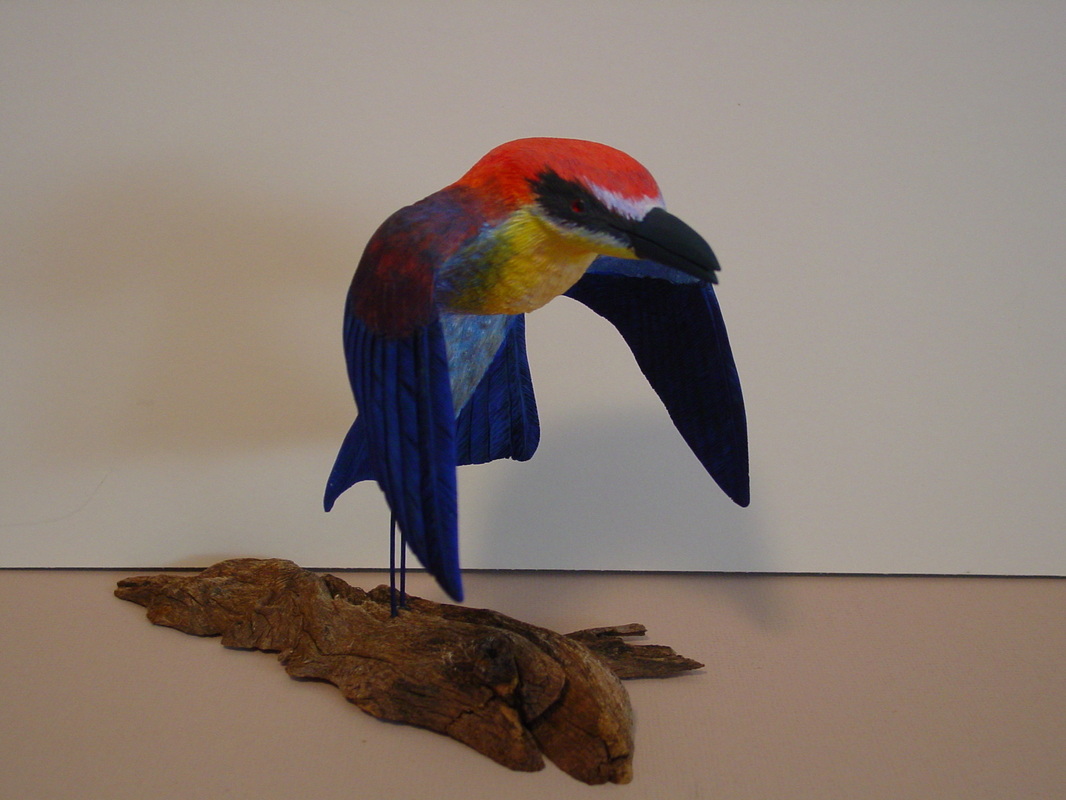
      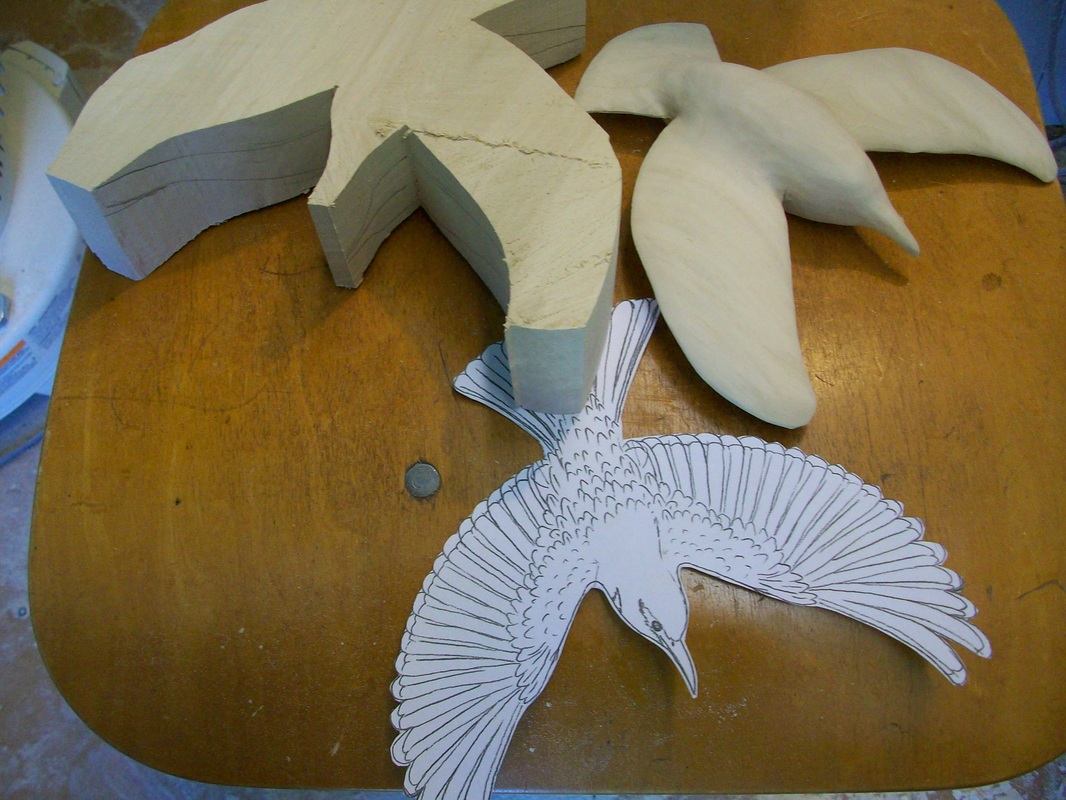   Because I am not a artist, The drawing process is very difficult for me. I am proud of the drawing progress at this point and now on to rough outs. The hovering one with dragon fly is about 1/2 size. Wood removal has been difficult because of the angles between the wings and the tight area to get the power unit in there. But it is coming along. I am pleased at this point. Yes there will be 4 Bee Eaters when I am finished.
One with an open mouth with a bee, one hovering up on it's tail with a dragon fly, one flying with open wing span and one just perched. I hope to get a branch with at least 5 white apple blooms to add to the habitat. I plan to mount 2 on one branch and the other two will be separate mount mounts. This will be a separate study all together posted here. Guess it looks a little confusing at this point but it will come together in several more weeks. I hope!!!!! Final Shaping to detailing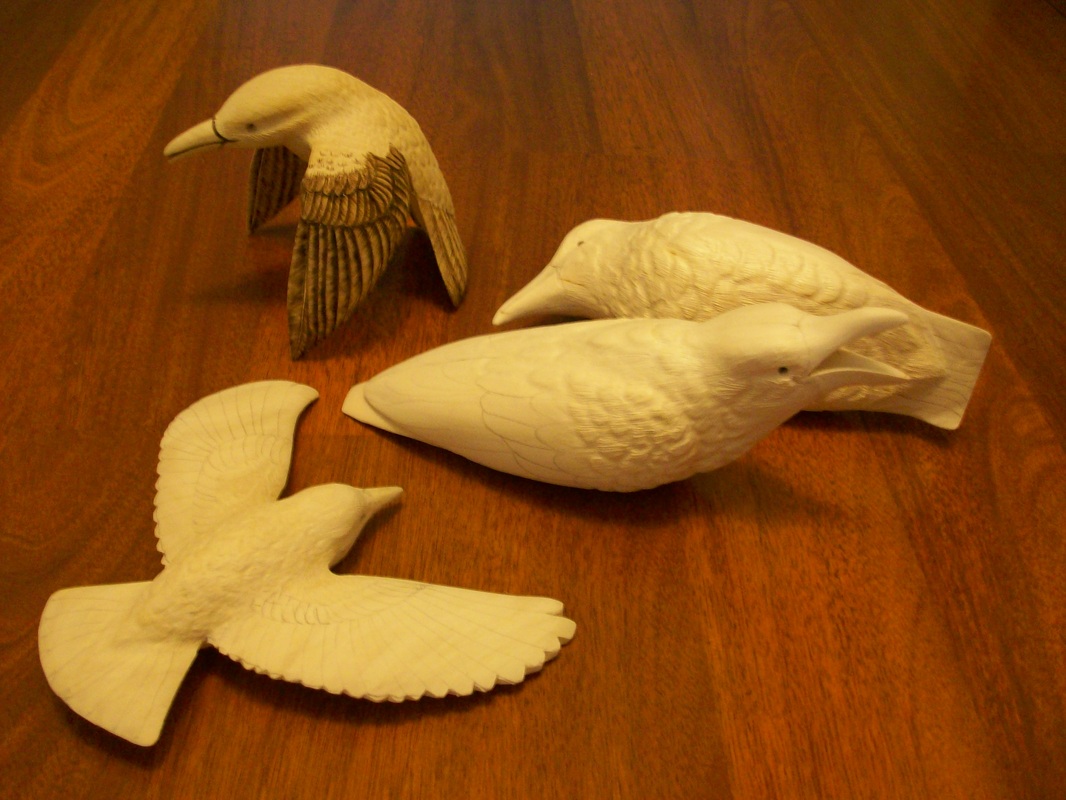
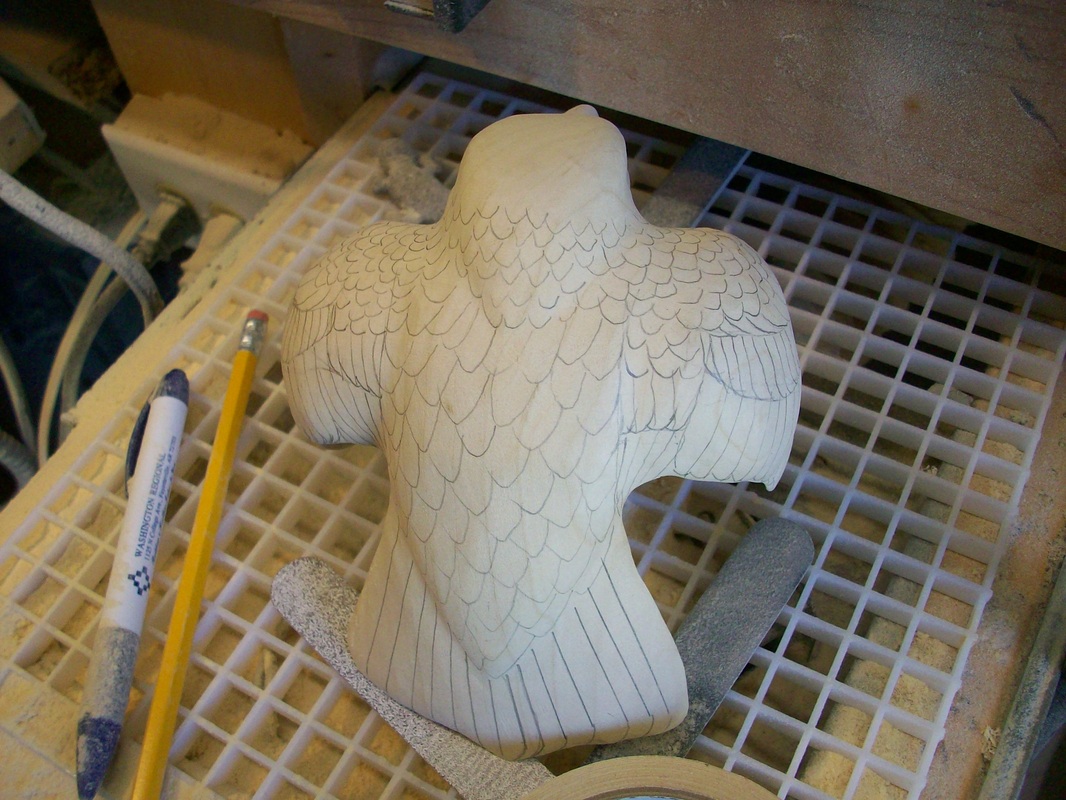
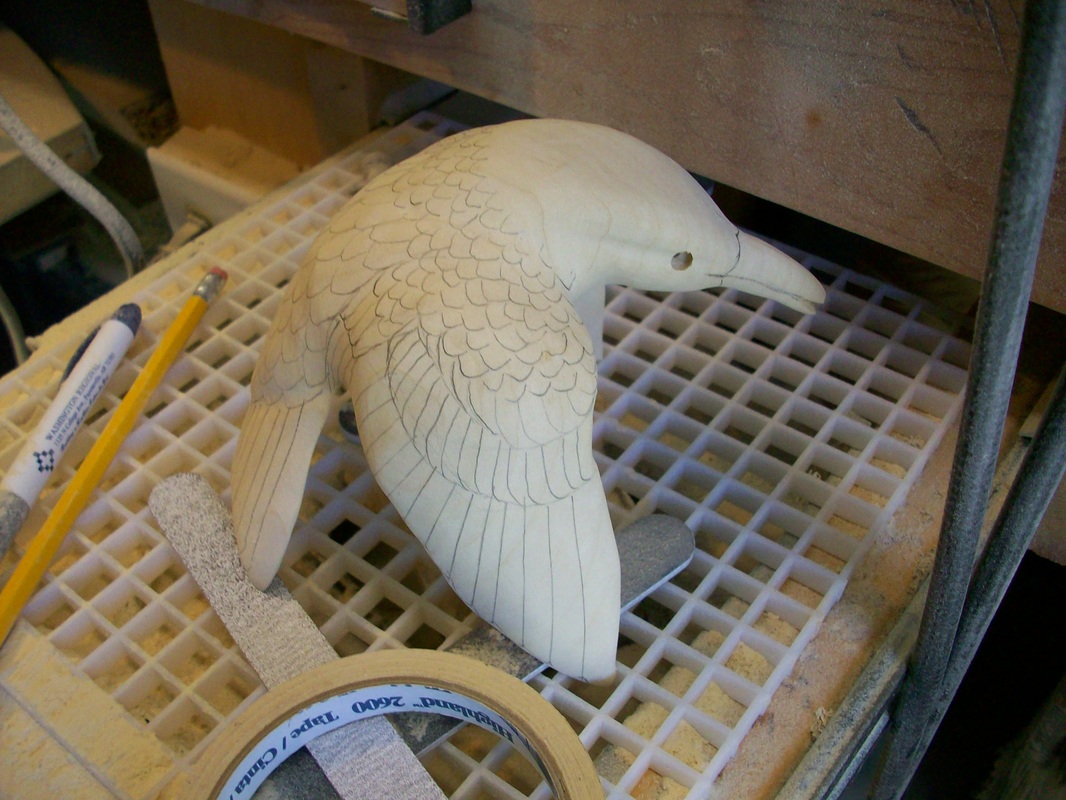
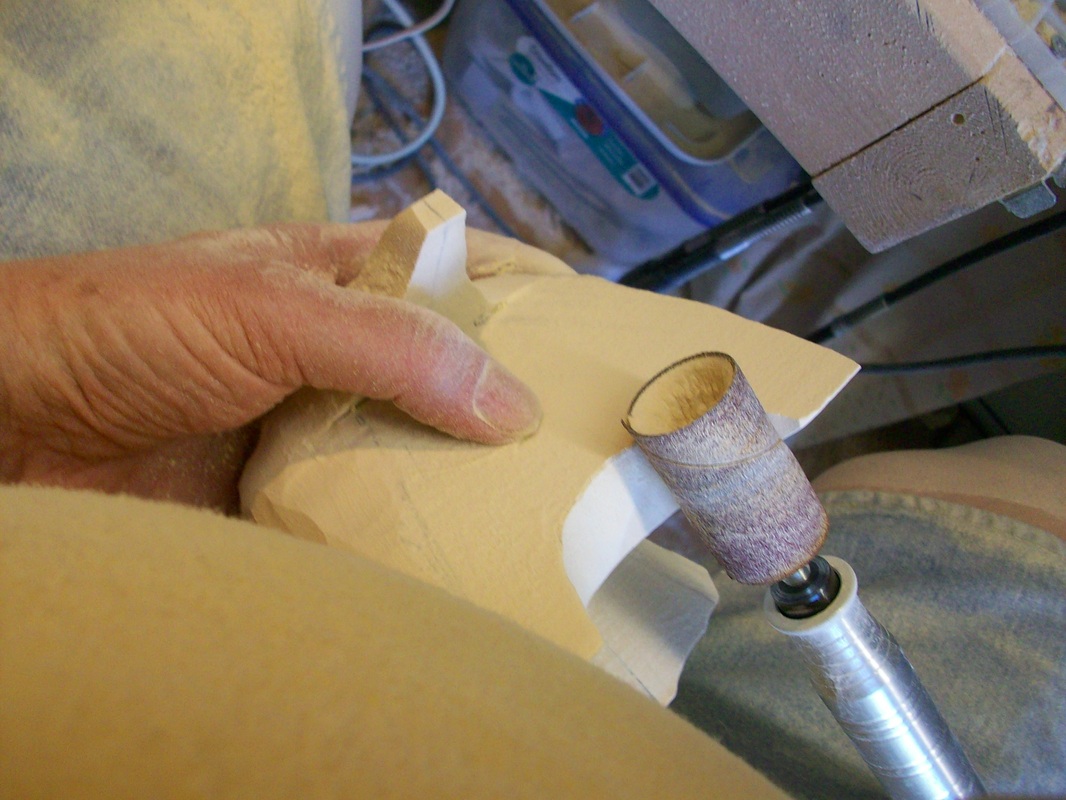
Slow progress here. Detailing always takes more time. I can see a couple of areas that my pattern needs some adjustment, but it really came out good. Testing you on how to get power tips to detail into the inside/under side of wings. Burning was a challenge also. The basswood ones are more of a challenge because for the fuzzing. Love tupelo, wish it was not so expensive and high freight. This is going to take several weeks to get to the painting stage.
Bee Eater Update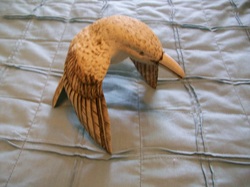
Here is a progress report on the Bee Eaters. Sure is a lot of detail work to finish up four birds. From pictures to patterns to final detailing has taken me longer than I figured. Fairly pleased so far. Have made some changes to the patterns as I carve the birds. Hope to get to the painting soon. I still have some shaping to do on the bills to thin them down some. I will post the burning detail later today as I finish up one of them.
|
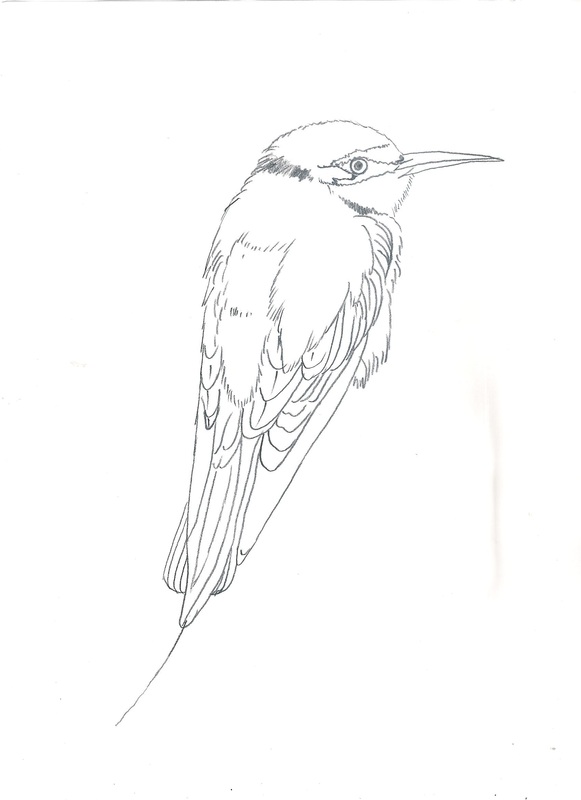
Pattern making -- European Bee Eater.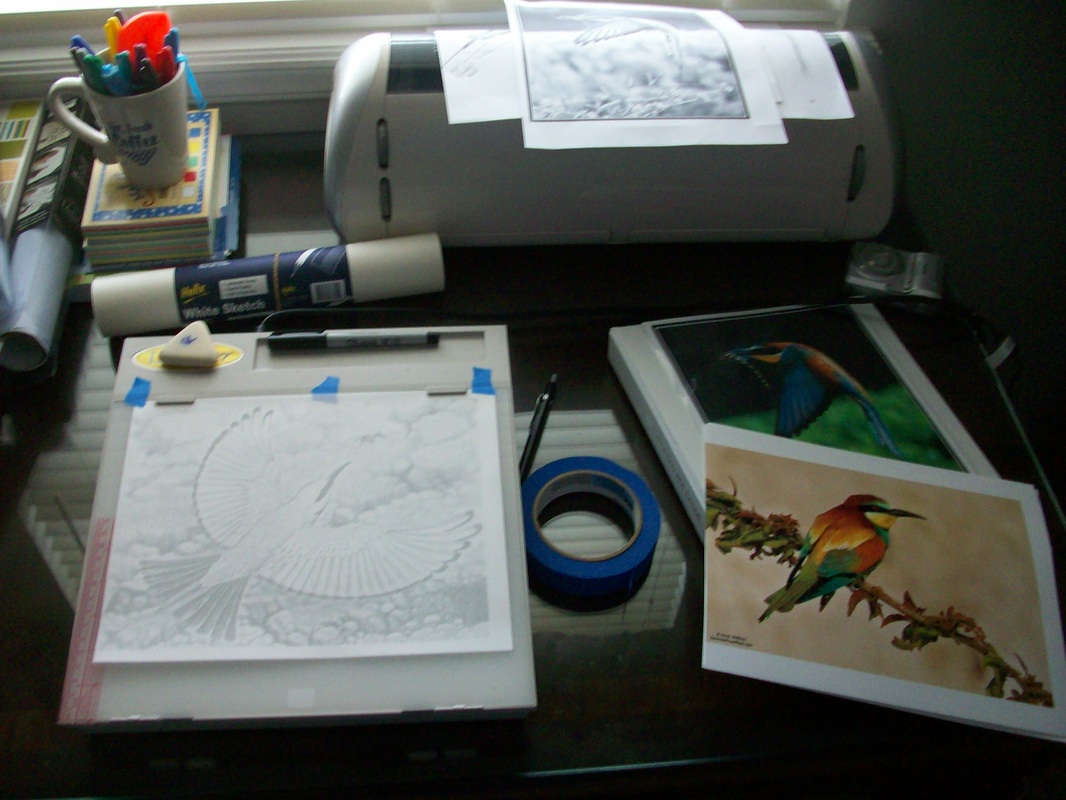
Hours later here is the first attempt to make my own pattern of the European Bee Eater. I am some what satisfied so far. Perspective and for-shortening are a real problem using just pictures. Finding one that is straight on, square, and a side shot , top shot and bottom shot are impossible unless you do the picture your self. Taking the best you can find and converting them to pencil drawings using PAINT.net is a good start. Then taking them to computer or copier and getting a common size. I took a known size of overall body length of 10 inches and settled on mine to be 8.5 inches. From that I calculated another stable part, the measure from beak tip to center of eye on a side shot at 90 degree, length of wing and the tail length. Beak came to 2". Now on to step 2.
Drawing the basic pattern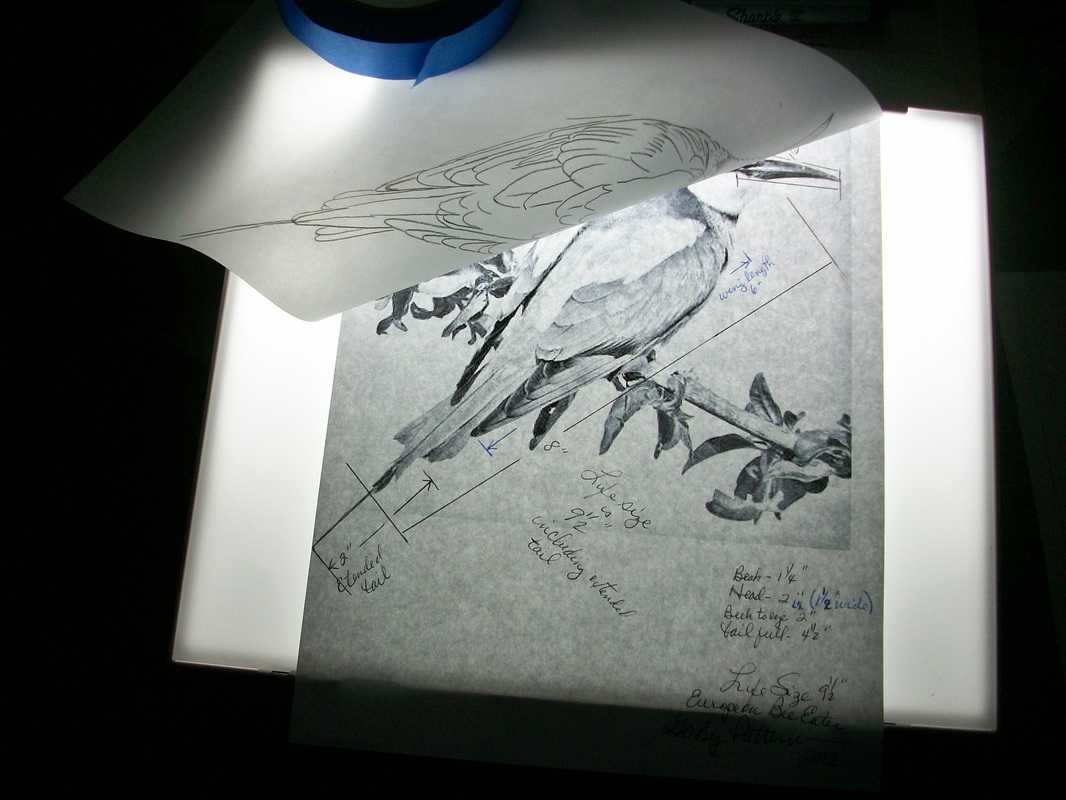
On to the light table. I selected the best shots that were converted and took them to the light table and traced the shape and detail. Tip: pencil will smear, after drawing part of the bird I spray with Krylon Fixtif to keep from smudging the drawing.
The best of 12 attempts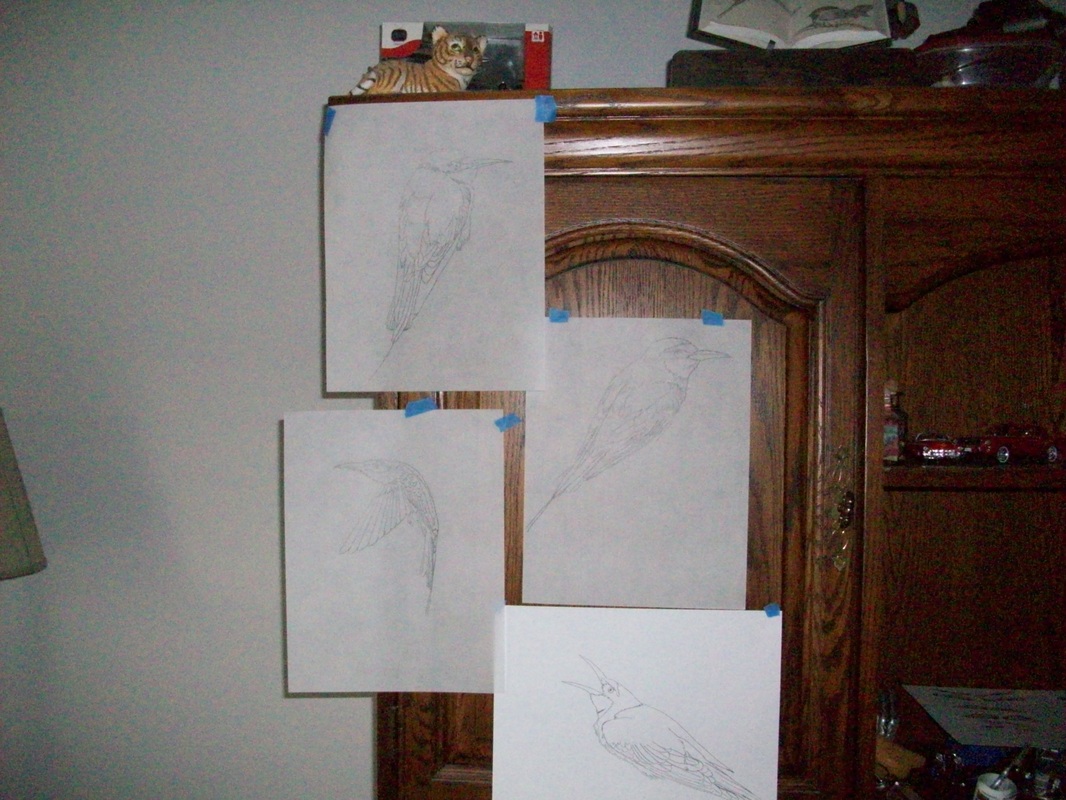
From these I made 12 line drawings, each time adjusting as best as I could the angle and perspective. Not there yet, though, as not satisfied with over all capture. Checking known measures and refining sizes and shapes.
Side Shot decision
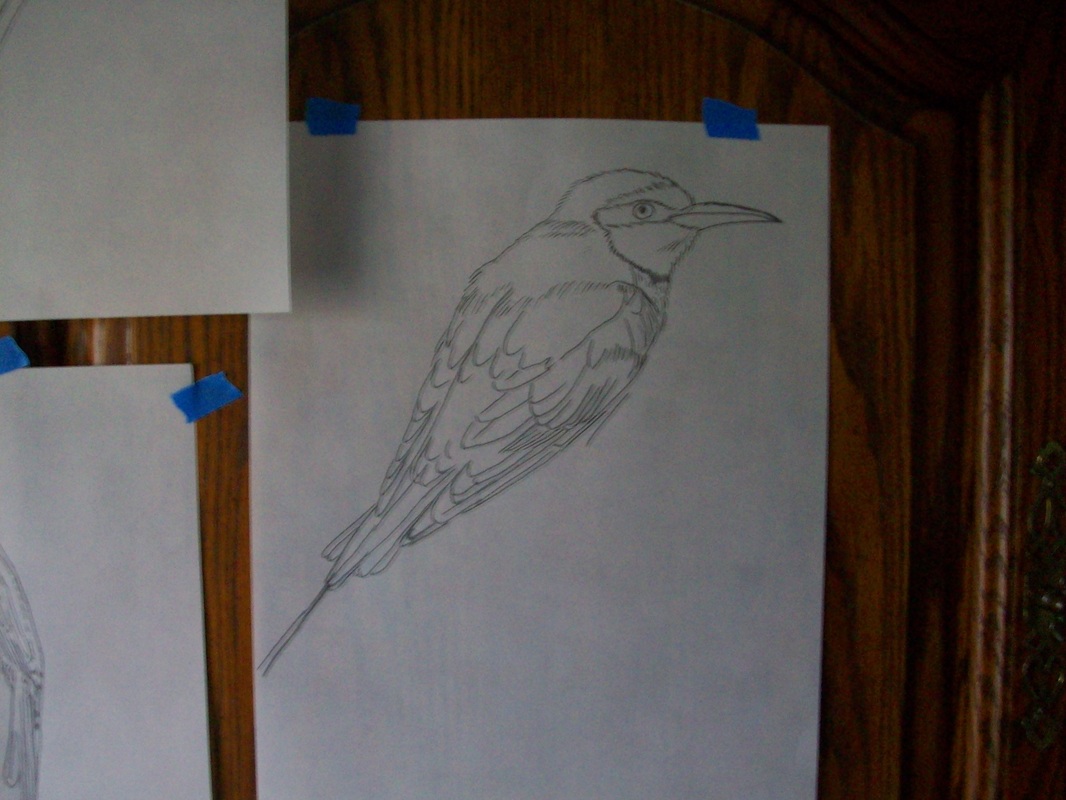
Now to select the best side shot to cut out on band saw. From this one I will make my cut out, then shape to measurements previously decided on.
Over 8 hours to this point. Measured drawings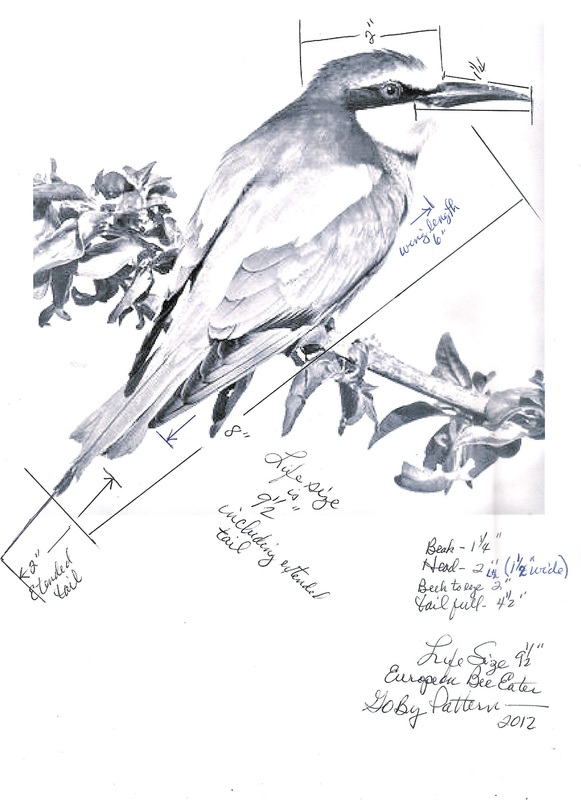
Here are the measurements I decided on. The bird 's finished size will be a little smaller than life size. Less than 10" long from head ( crown, not tip of beak) to pointed tail. Some of this will be adjusted and determined later as I power carve the wood away and get to final shape. I will stop here and come back in a week or so with the shaped basswood bird.
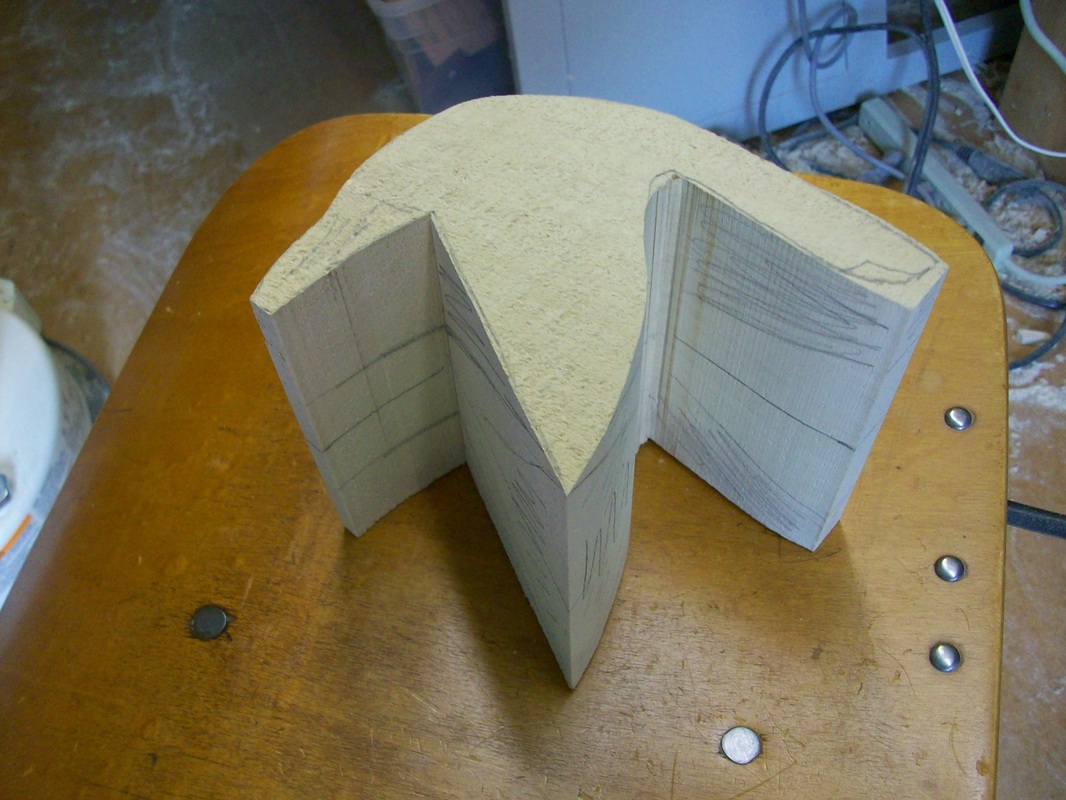
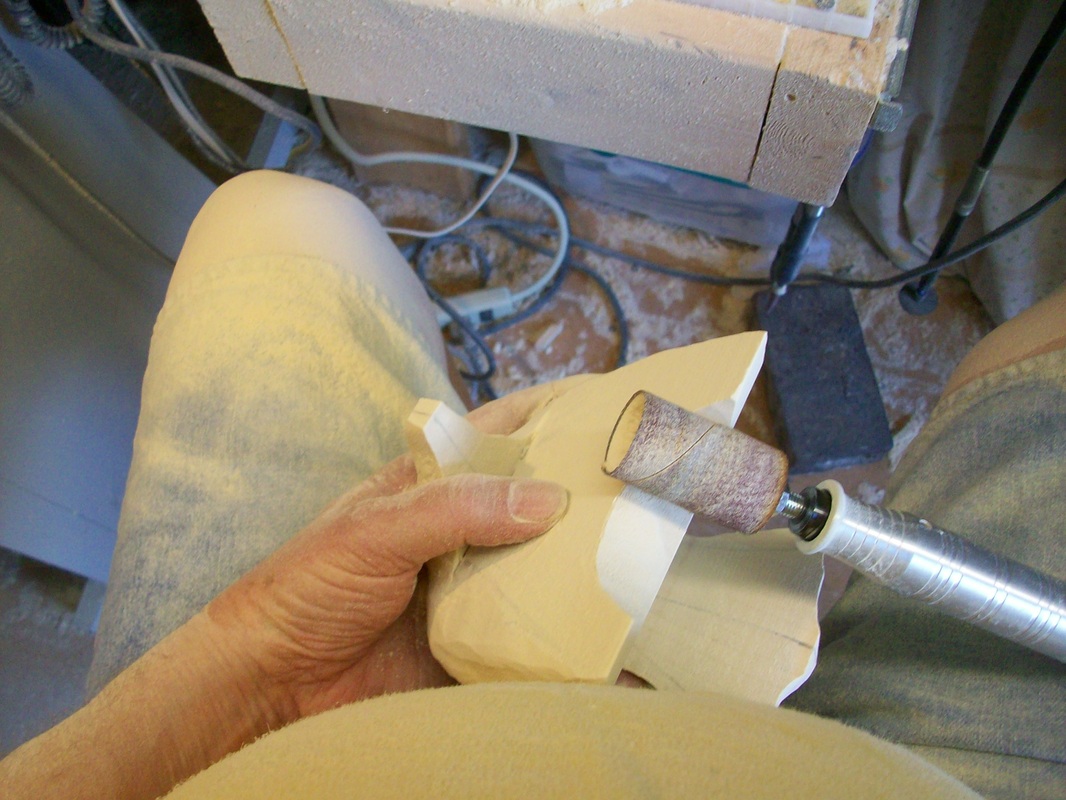
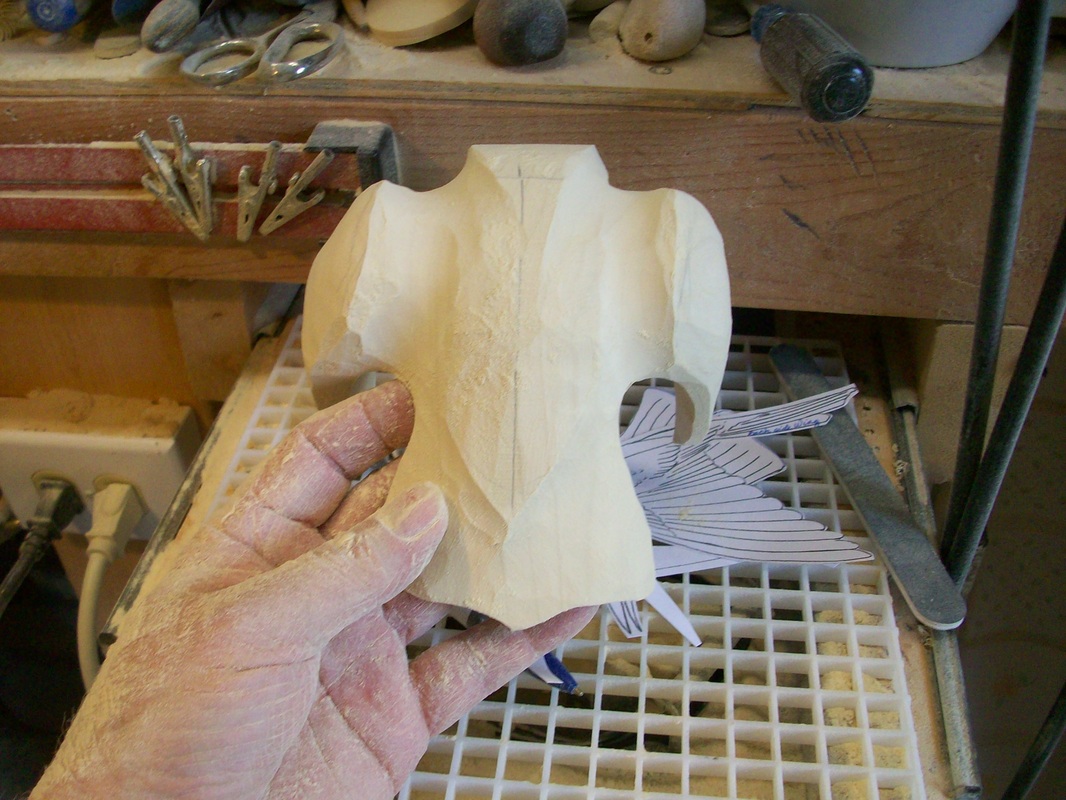
Now to the cutout and grind to rough out stage
Are we there yet, well almost. This is the first level of grinding, now on to finishing out, needs much more ground off to get the trim look. But yes we are almost there.
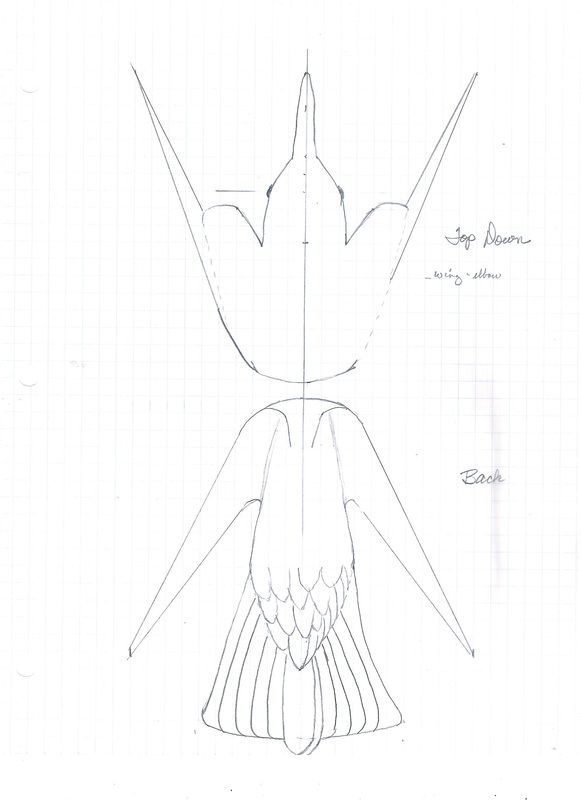
Tracings and perspective design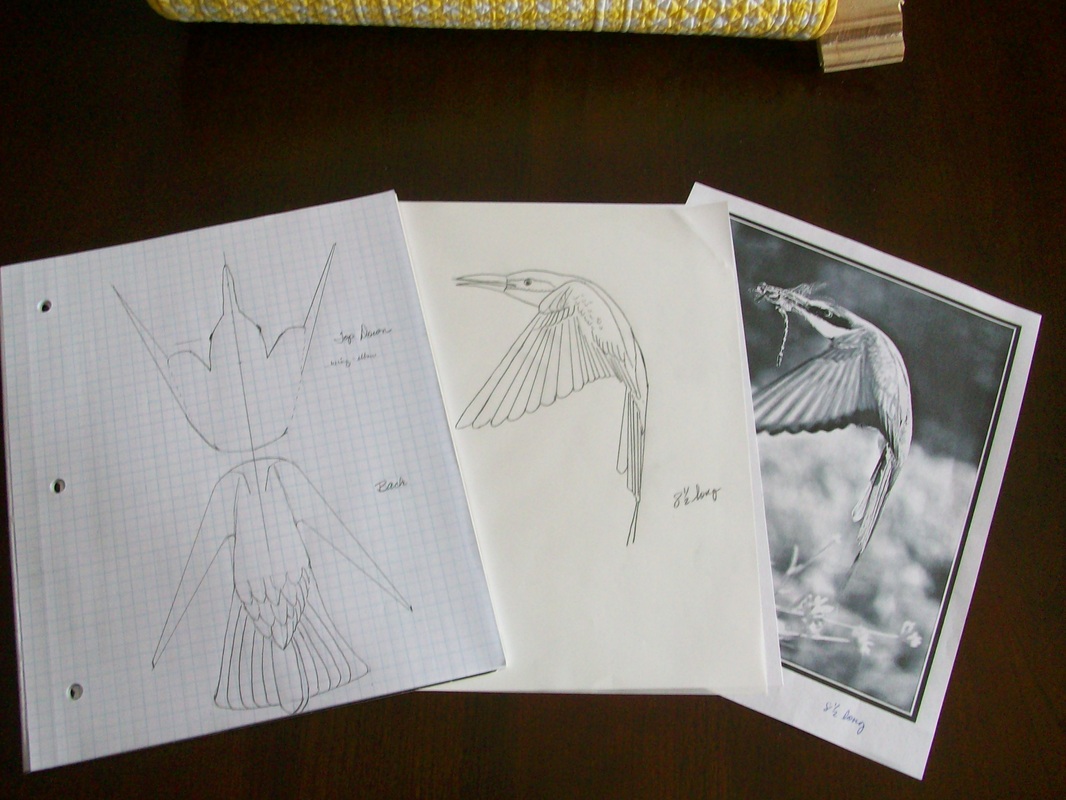
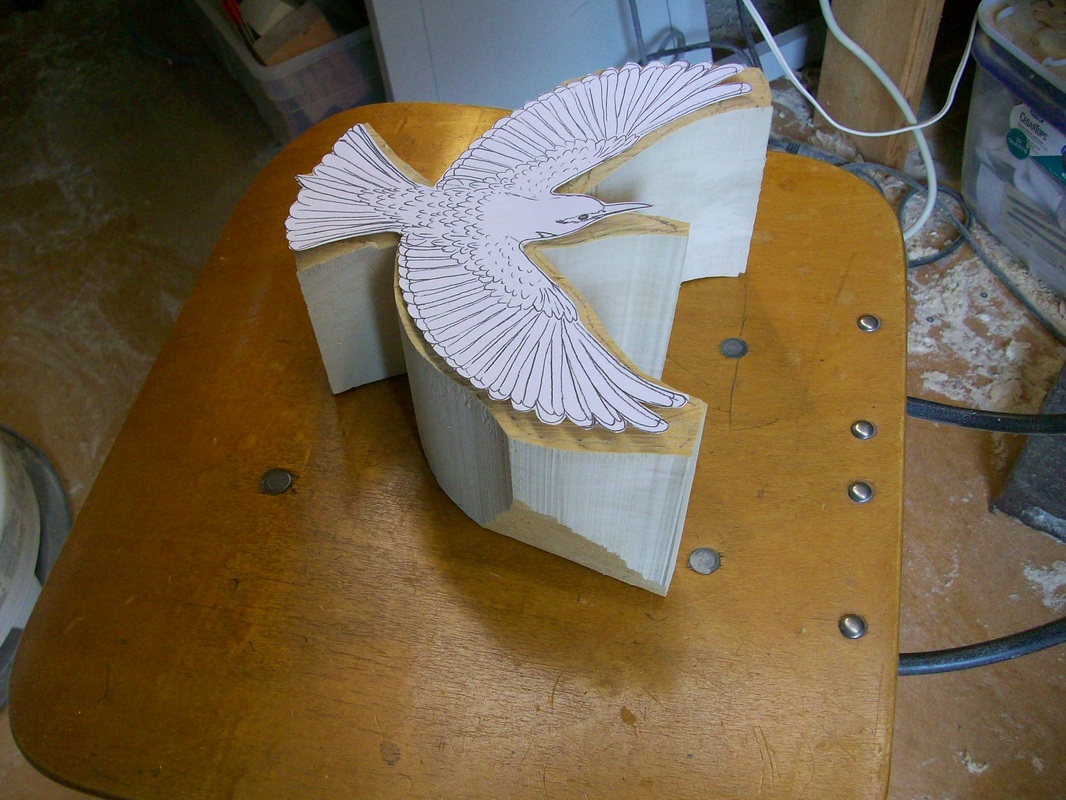
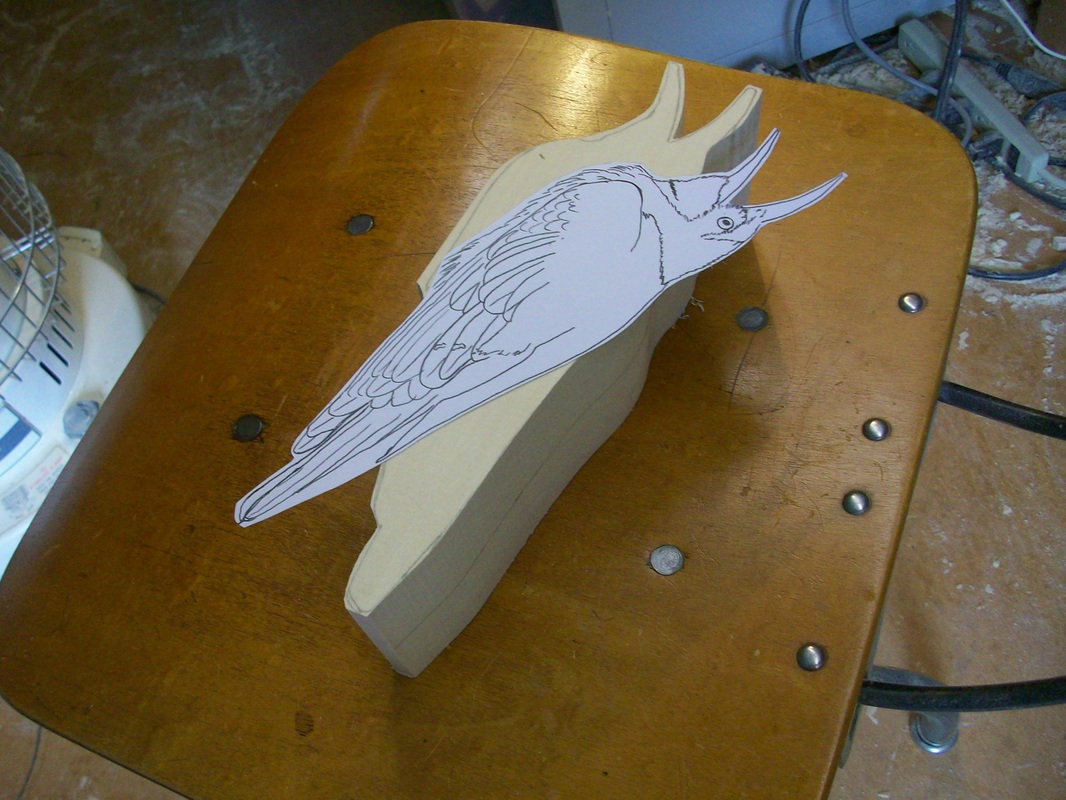
Here is another design I am working into a bee eater carving, kind a tail stand with a dragonfly in its bill.. First I did the tracing, from the Paint.net pencil conversion. Next I made measurements on the conversion sheet also using previous measurements made from other picture conversions. It became more difficult when the bird has a different pose than a straight on one. After getting the measurements, I used a 1/4" blue grid sheet of paper, I transferred the specific points onto it. Like the bird width, length of tail feathers, lower body width, bill and head. Then sketched in the outline, checked for a accurate look.
Visual satisfaction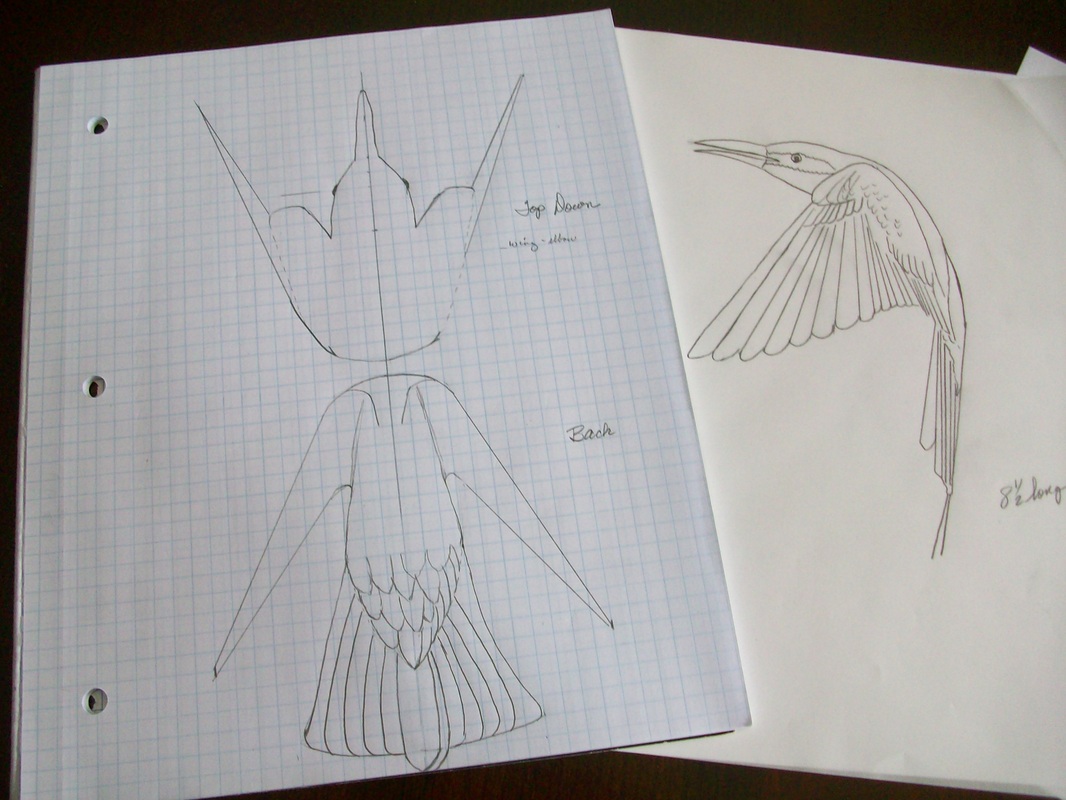
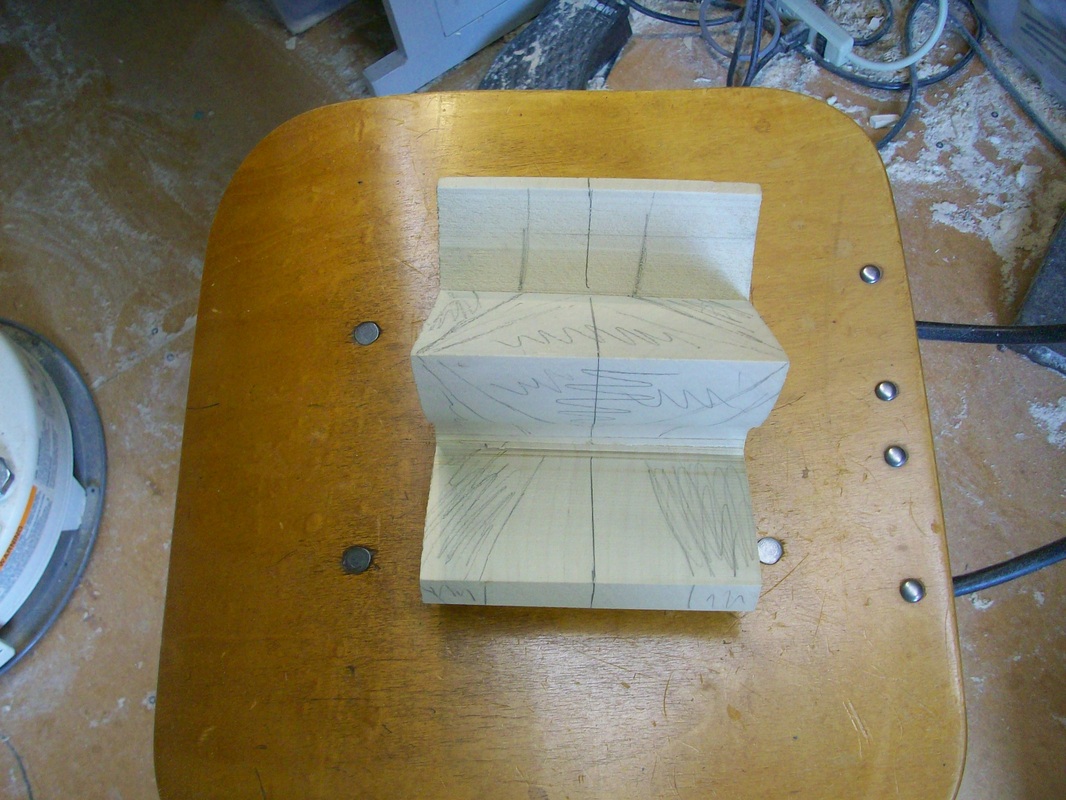
If I am satisfied with the overall look, I then try to visualize the top down & back look, using the given of the full side picture. From this I make my pattern, transfer it to wood and cut out. Constantly referring to the pictures and patterns I grind the blank down using a 1" x 2" long sanding drum.
Shaping to final size
There is a lot of wood to get rid of here, but it shaped up pretty well. 4 hours later and the shape is coming around.
      Color selection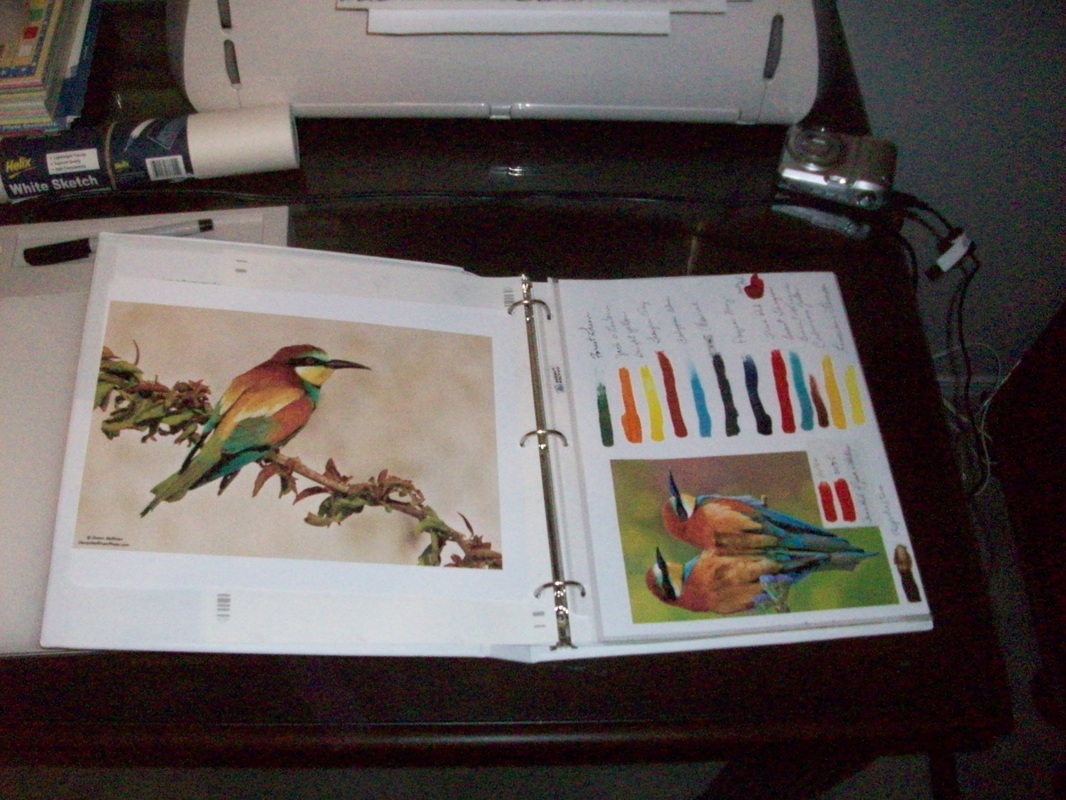
I ran out some pictures on Kodak Photo Paper and matched basic acrylic paint to the various areas. When I begin painting I will make washes and mixes to try and get best matches. This species has a very wide variation of color especially if photographed in the sun or shade. In my class I furnish the paint and give a swatch sheet just like the one above.
Painting progressOn to the finish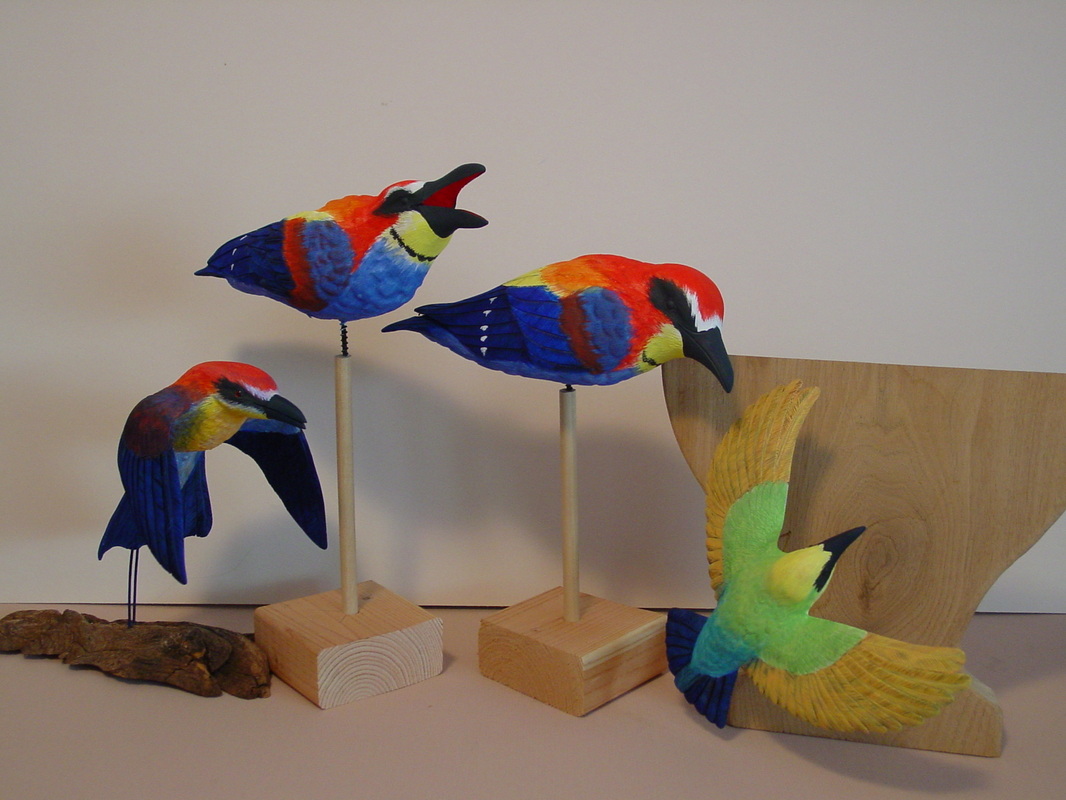
I have some more to do on the painting process. Final highlighting and then on to feet/legs, perch and the bees and dragonflys in flight. This project has been a lot larger than anticipated. Anyway here are a few more pictures.
    |
